RailSet System
AVERVE RAILSET
The Railset Web provides the quality assurance and specifying convenience of a pre-engineered system.
Railset Benefits:
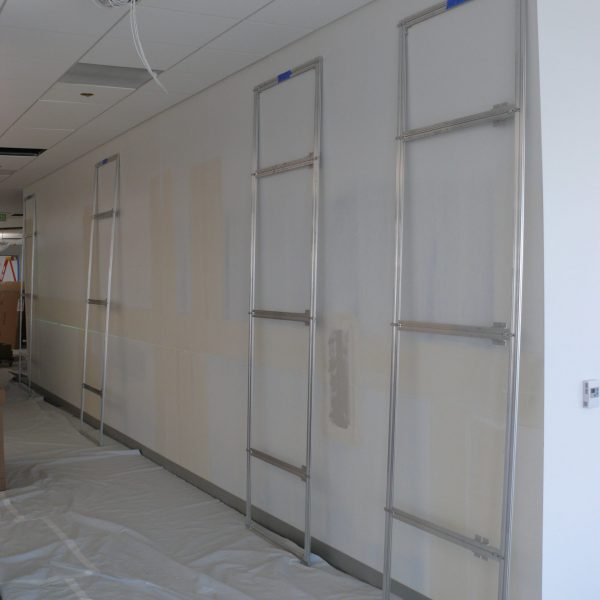
The Railset Utility Web is a patented aluminum hardware system used as a non load bearing armature for panel and fixture installations. The utility web can be pre-assembled in sections that correspond to each projects framing layout.
Eliminates Wall Prep
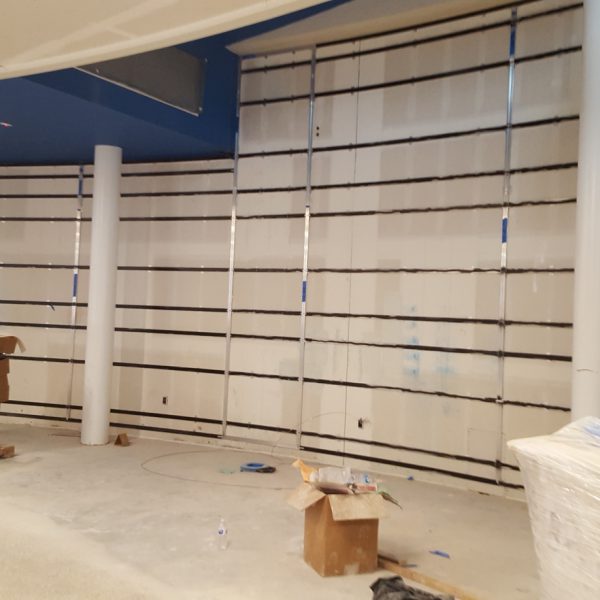
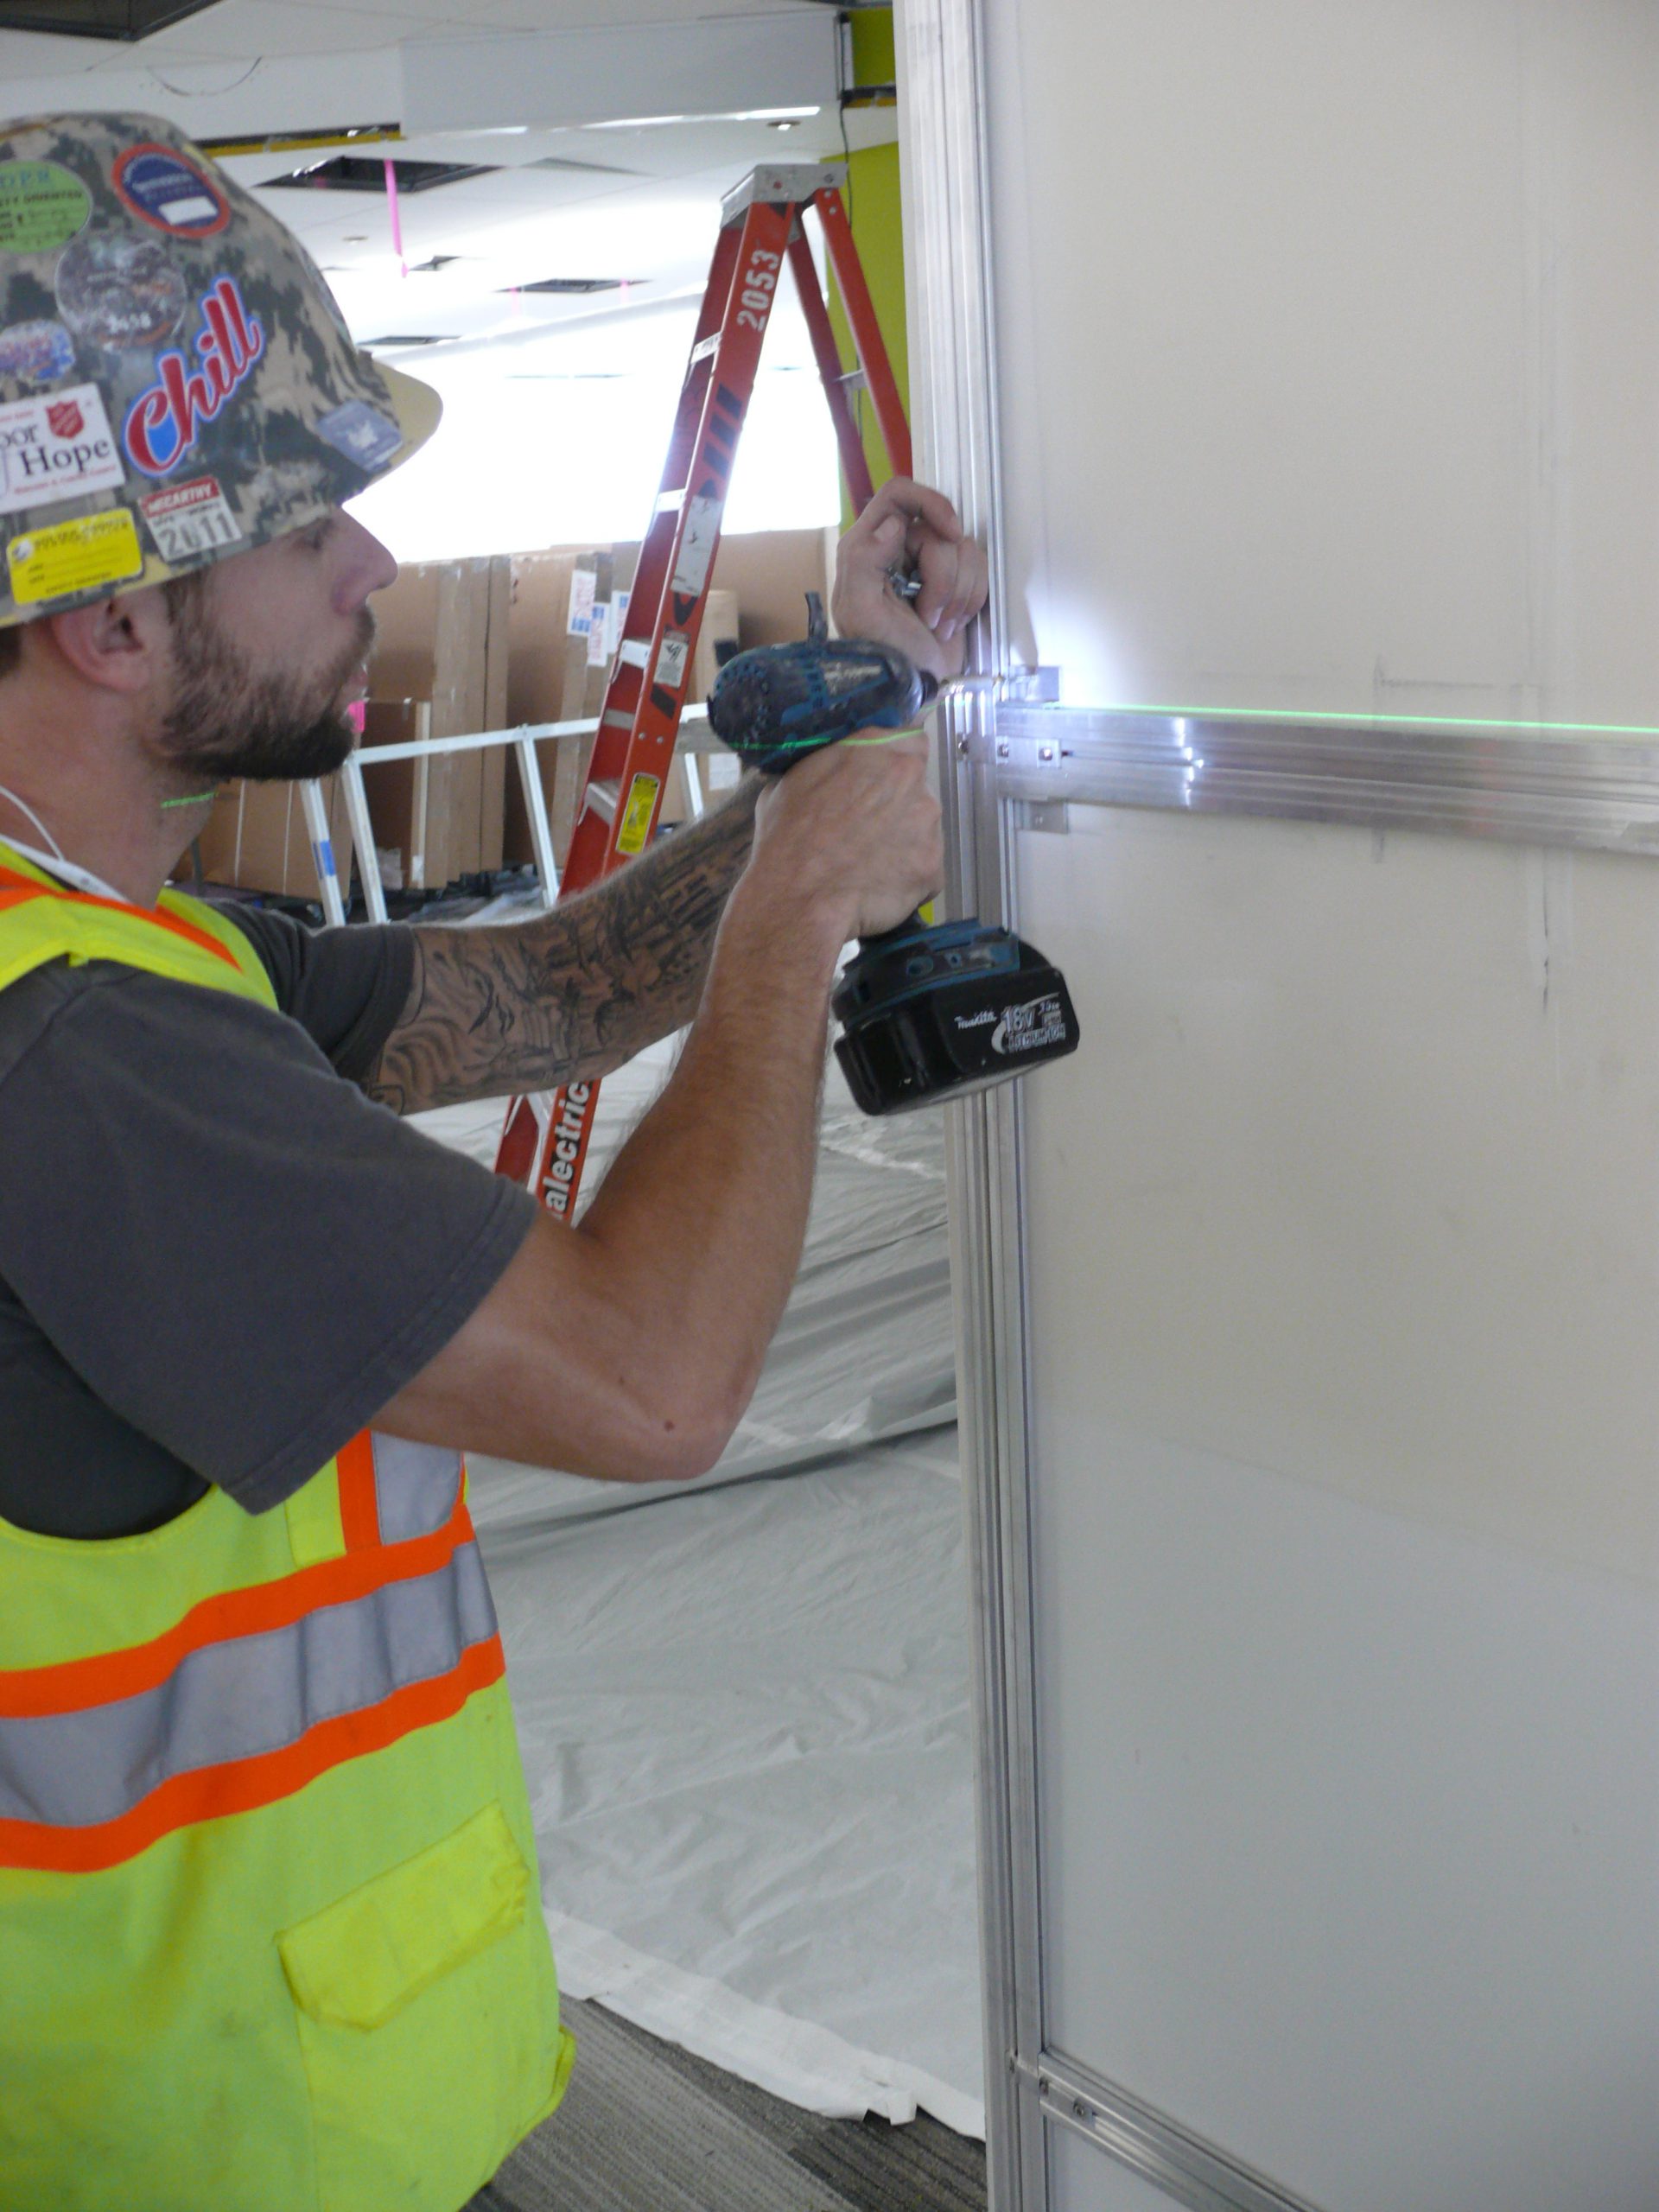
Mount the web directly to the wall- The Railset Web bridges all irregularities in the sub wall. Railset’s wall mounts slide along the rail to the stud – attach every 32” on center. Shim only at the wall mounts.
- The Key Frame, assembled in the shop, identifies all horizontal panel joints. Once attached, the Key Frame sets the square and level for all rails on the elevation.
Supports Unit Construction
Remodel a space in hours—not days.- Assemble the framing for a light cove or drop ceiling in the shop, then plug in at the jobsite.
- Create a cavity for new utilities
- Fur out an existing wall to eliminate unwanted returns
- Create a cavity for back-lighted graphics
- Create a cavity to flush mount video monitors and directories with adjacent decorative panels.
Clad with Different Materials and Shapes
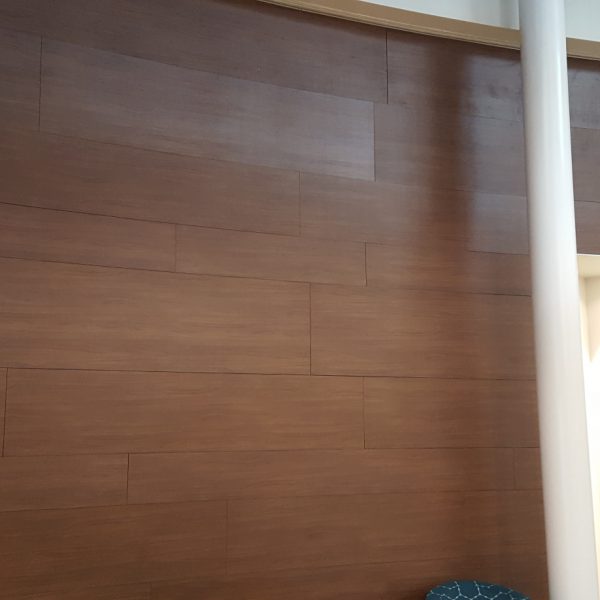
Radius or flat, rough or smooth, they can all flush onto the same plane- Back-lighted graphics, metal and wood grain laminates flush perfectly on the same wall
- Attach Railset directly to steel stud – no drywall needed
- Provide your own panels or select from our portfolio of finishes
- Railset’s decorative trim collections adds the finishing touch
INSTALLING WITH RAILSET
One System Does It All
Partition—easy to install, easy to relocate
Framing for soffits, columns, a new utilities chase—No stud & drywall required
Mechanical installation for architectural panels on walls and ceilings
Railset uses the same components, no matter the application
Easy to specify and easy to use
Saves time and labor in that last critical phase on the construction schedule
Is always square, level and plumb for a perfect finish!
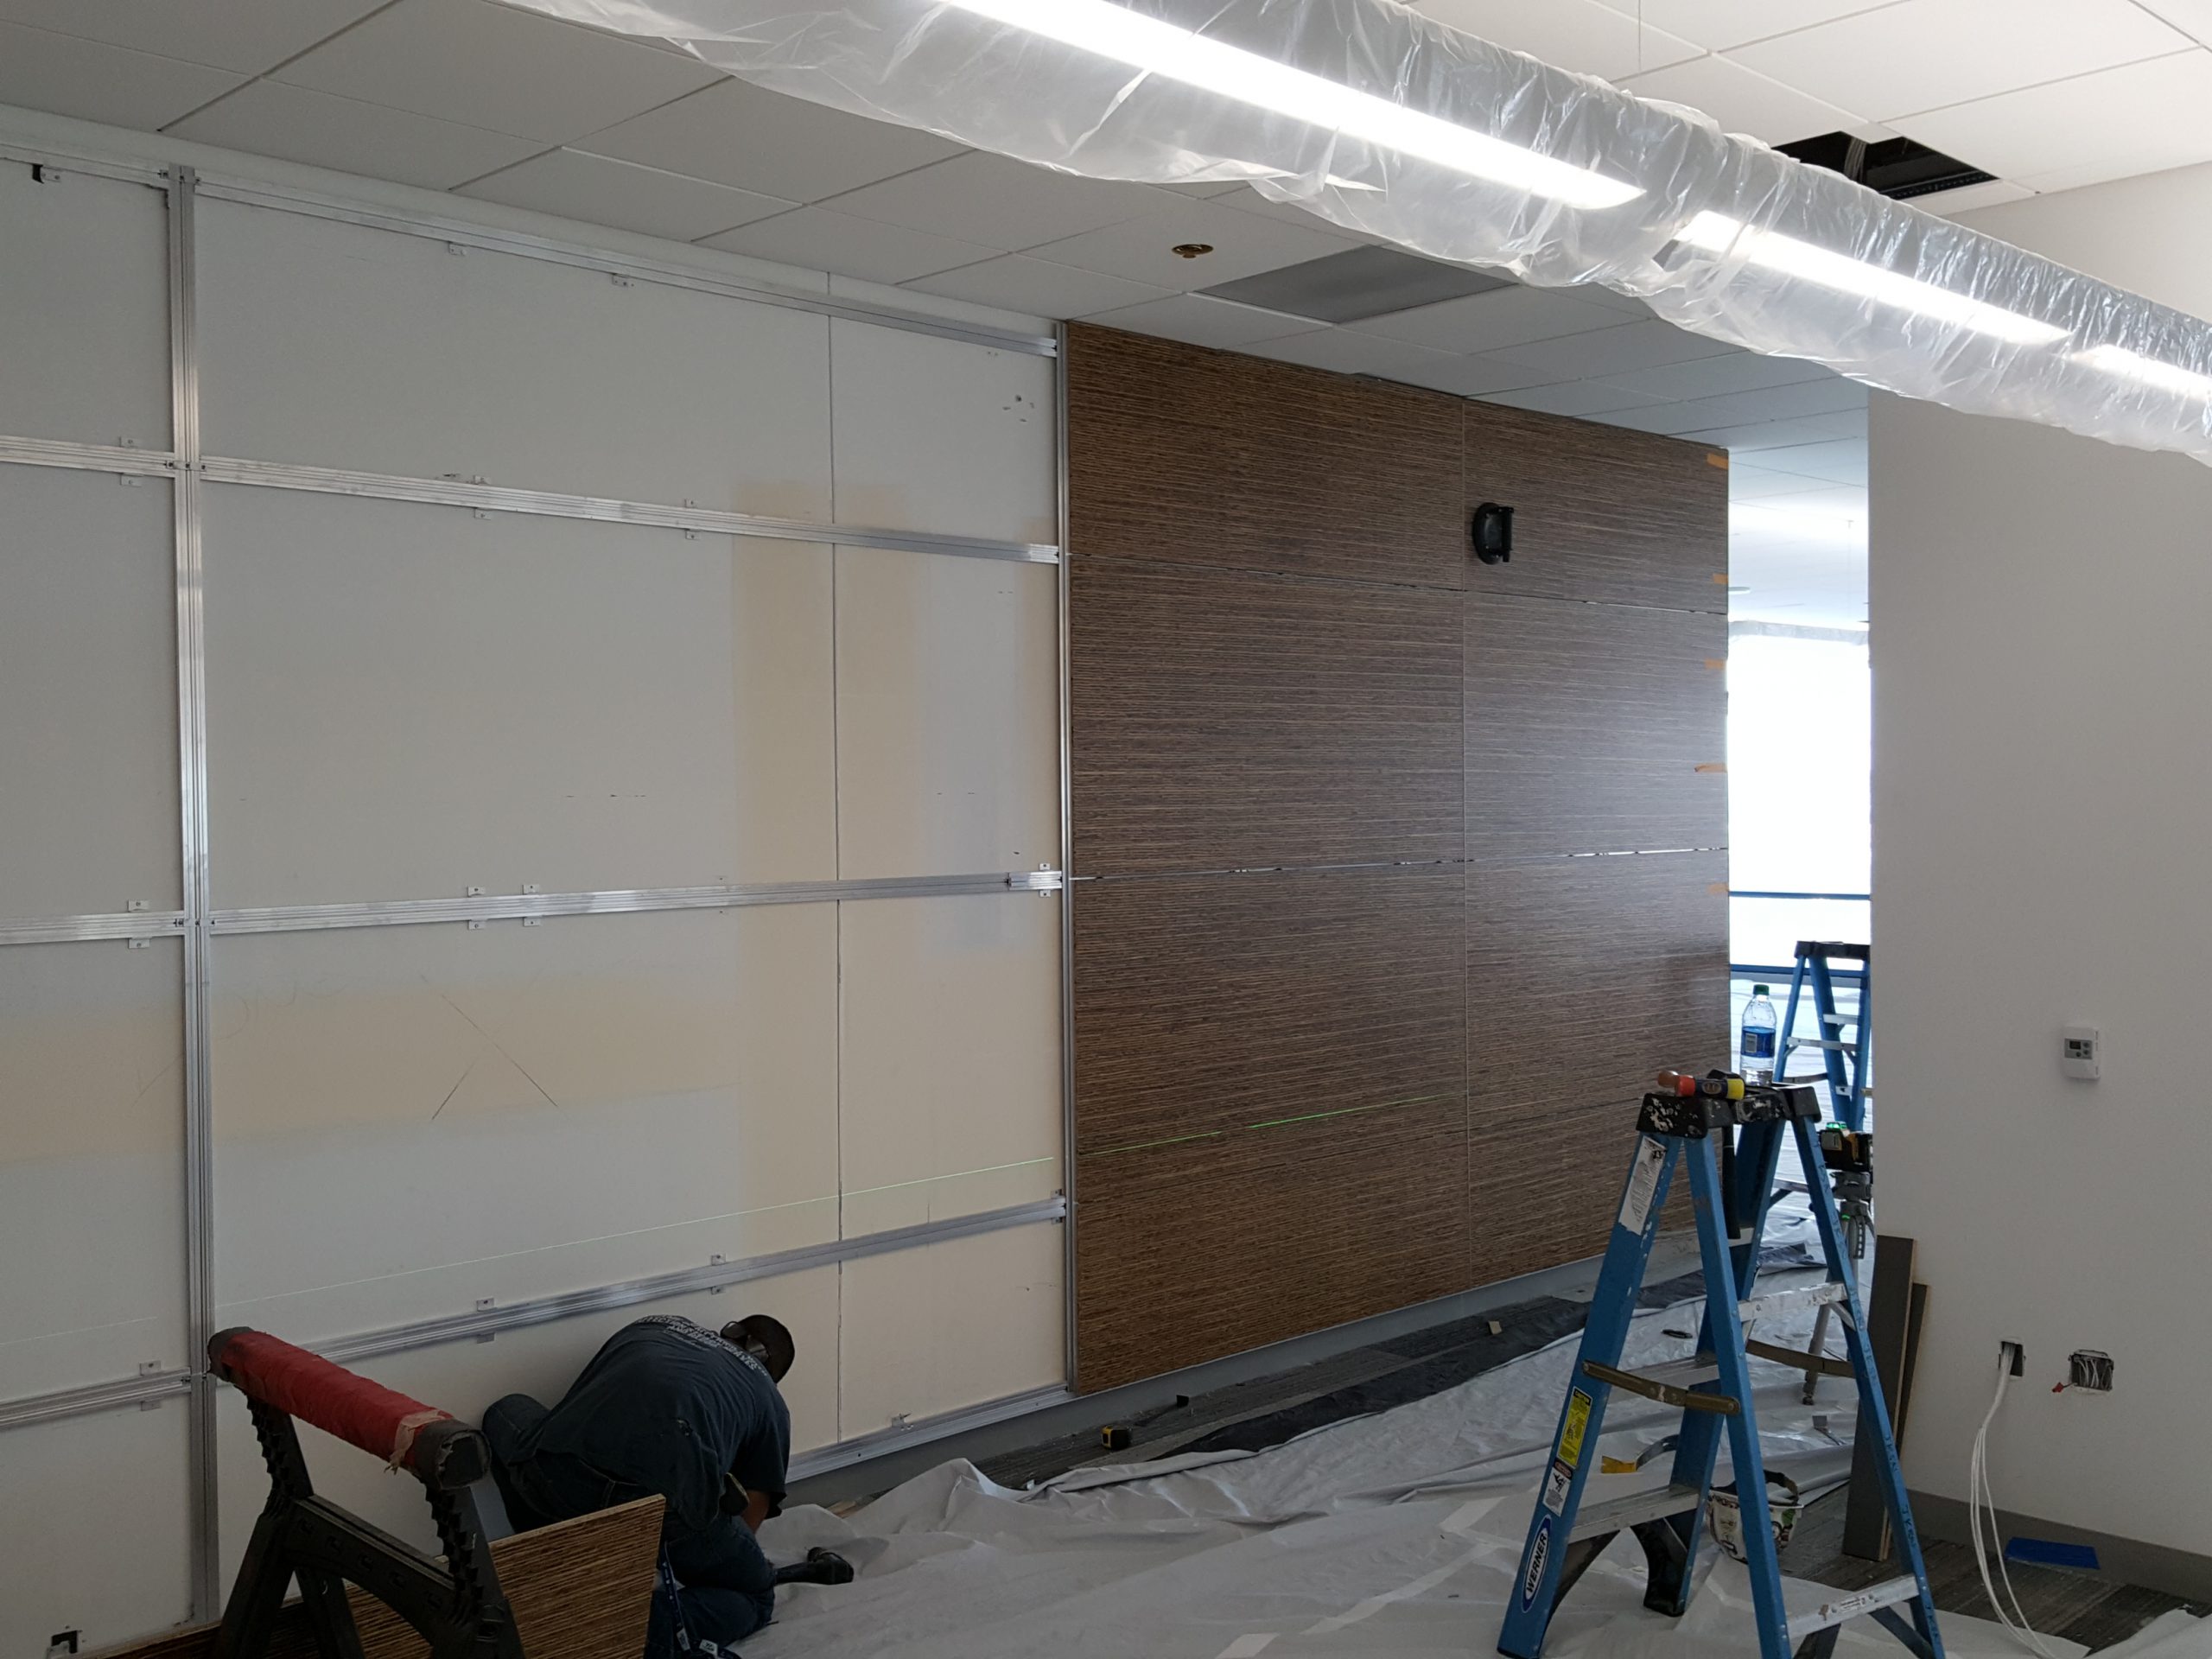
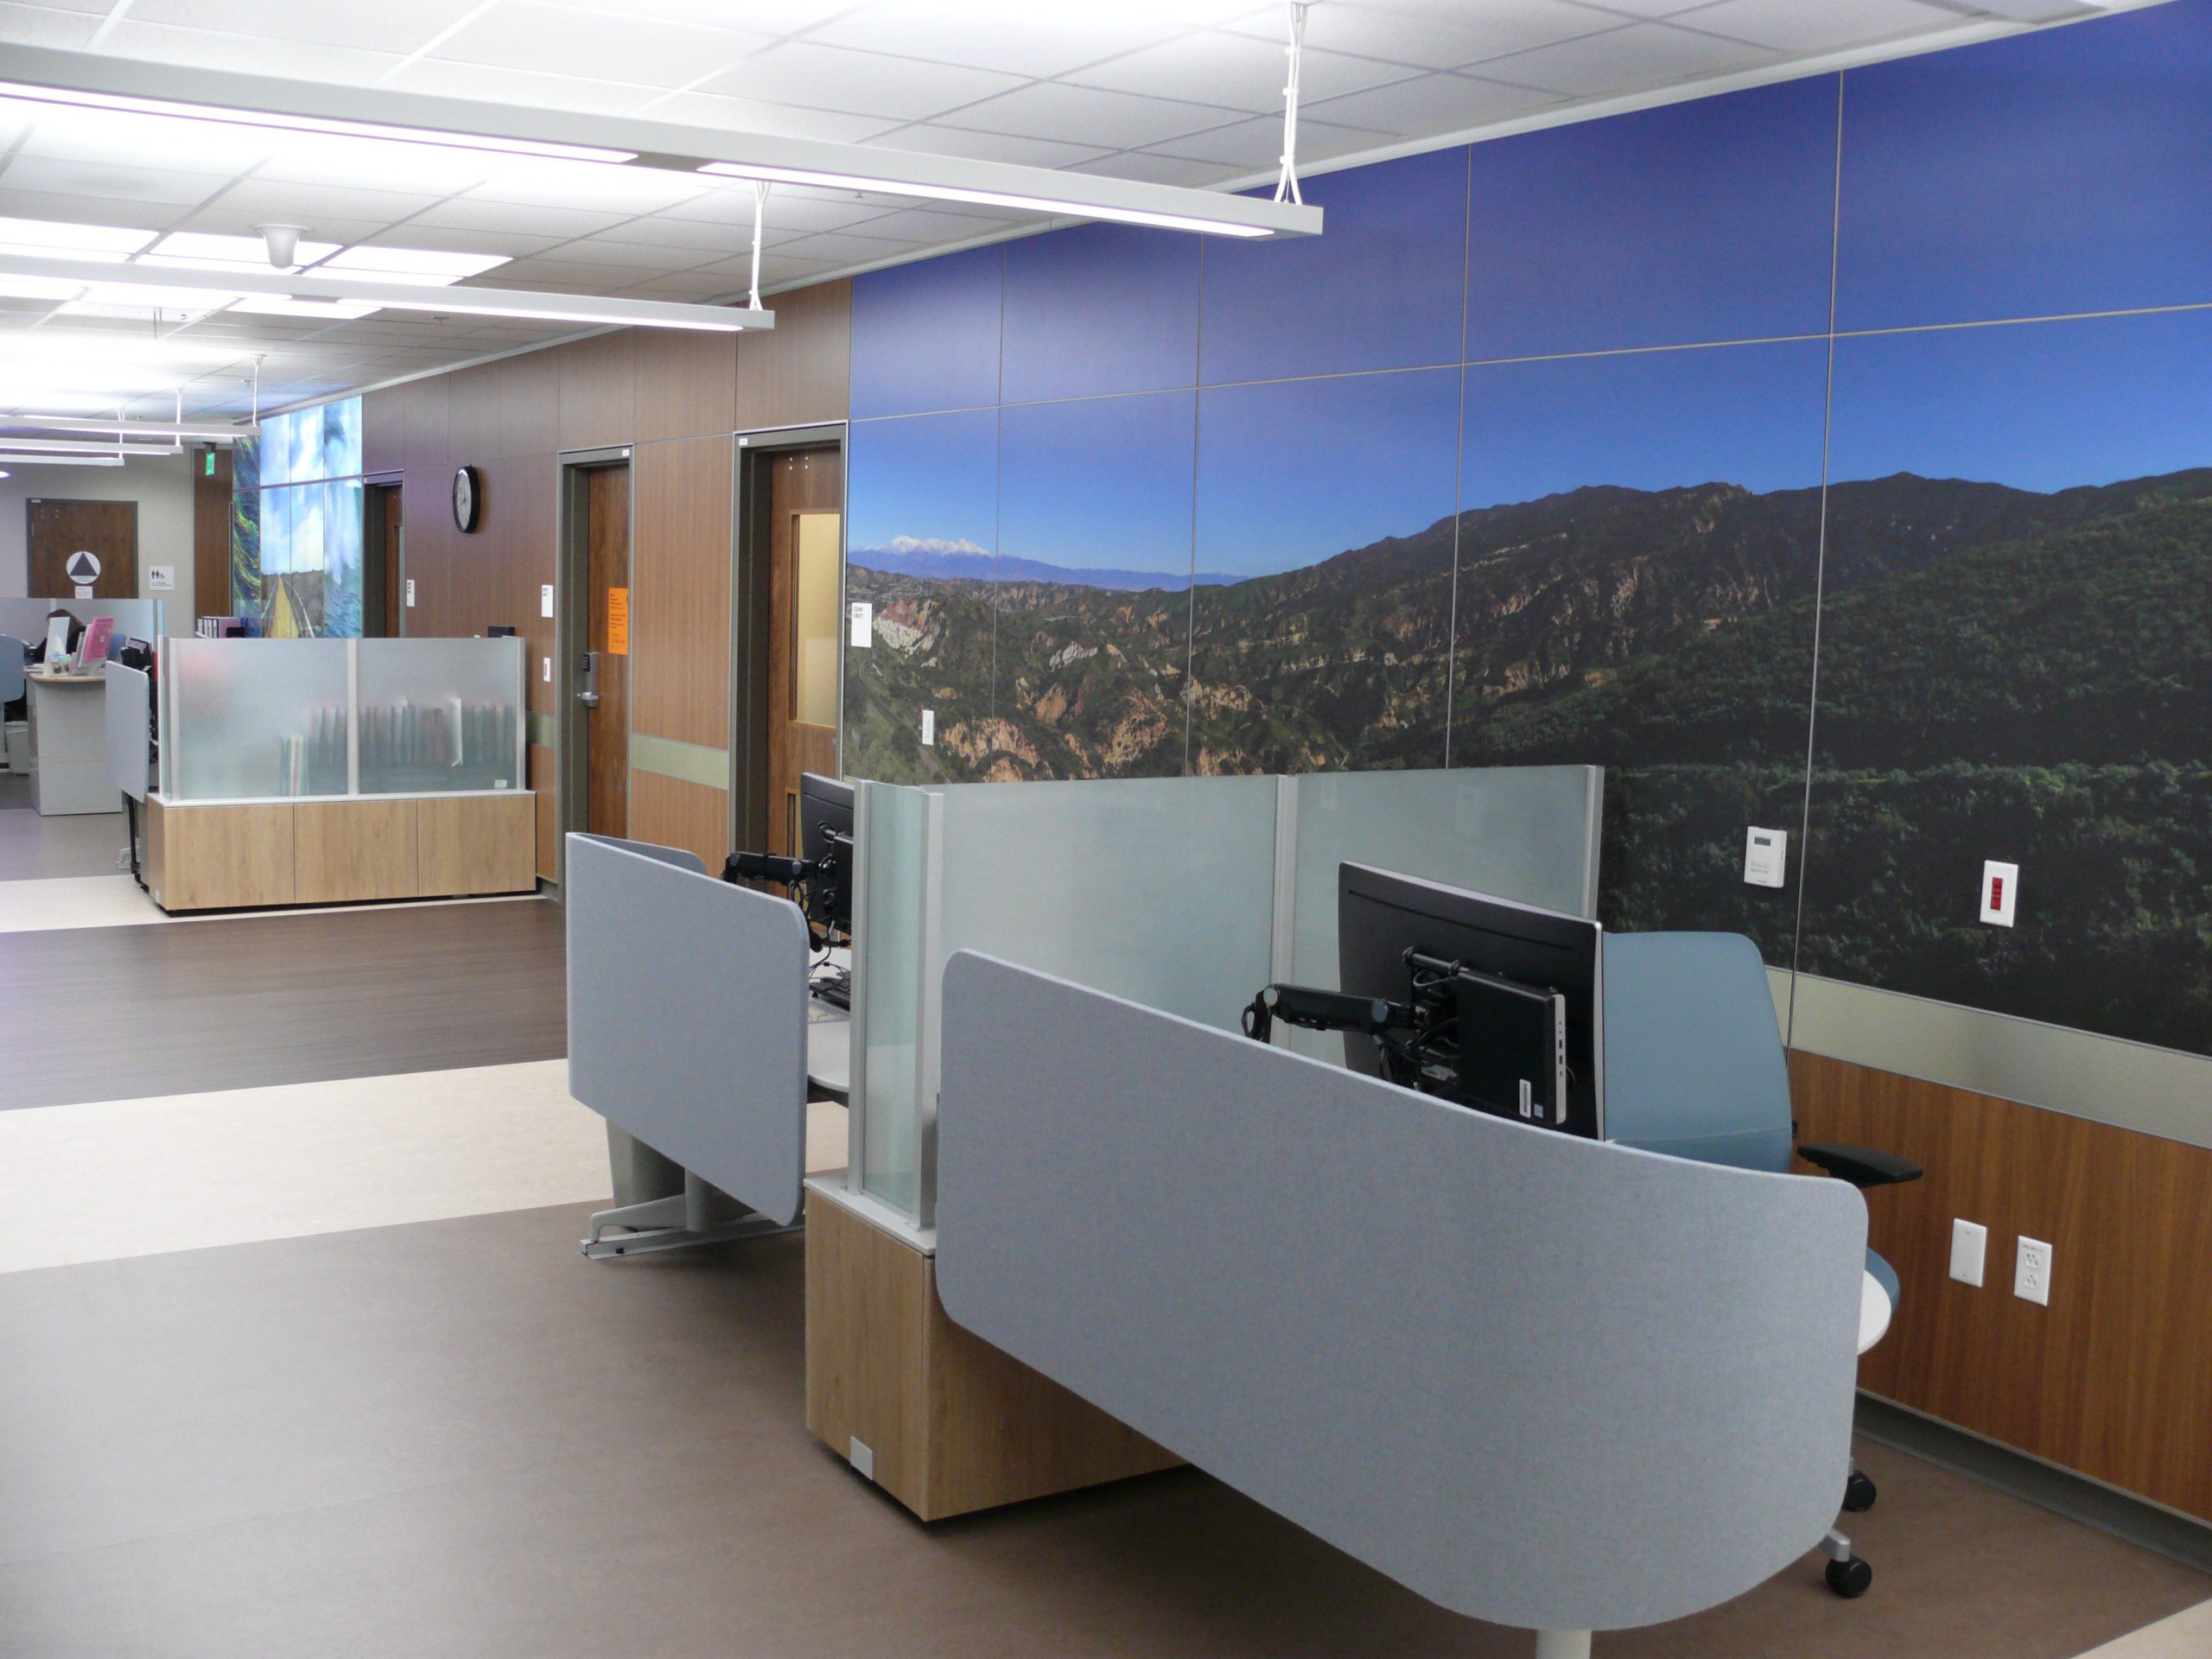
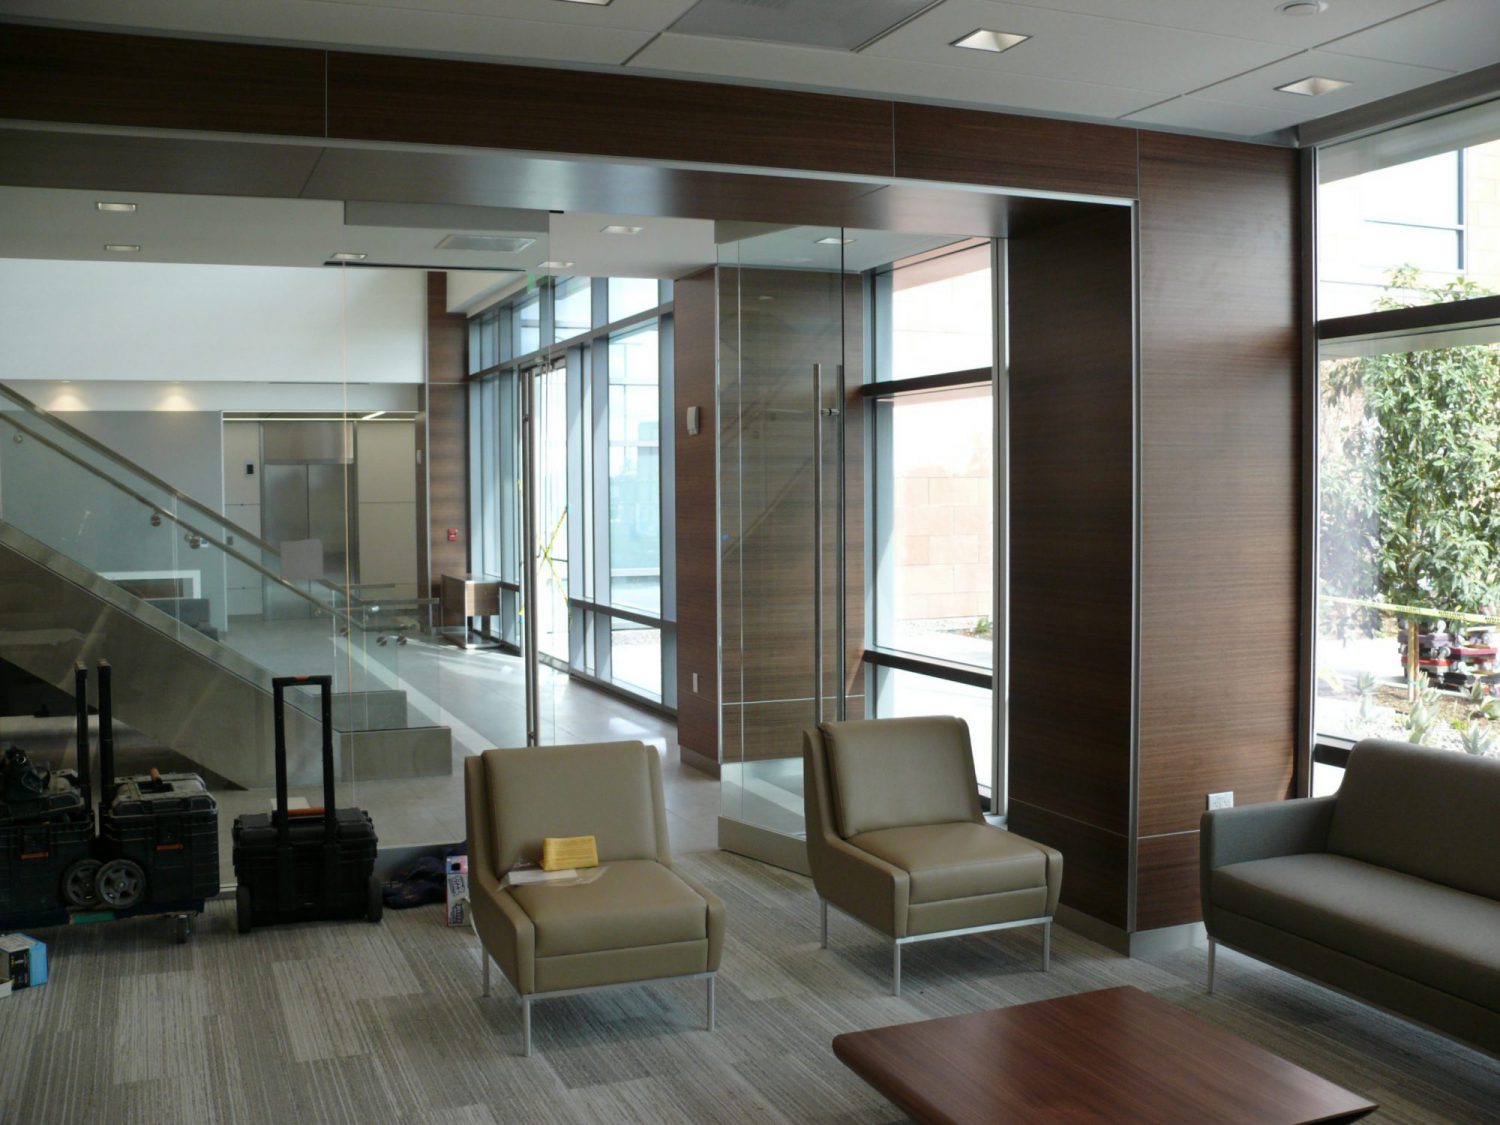
Wall Cladding
Mount the RailSet web directly to the wallContractors agree, prepping the sub-wall is easily 50% or more of the labor on any installation. The RailSet Web bridges all irregularities in the sub wall, eliminating the need for wall prep. Railset hardware can be installed at the rate of 250sf to 350sf per man hour.
Preparation for a Railset Web installation is done in the shop
- Better quality control.
- Installation problems are identified in advance.
- Better budget control.
- Ready a wall for panels in hours, not days!
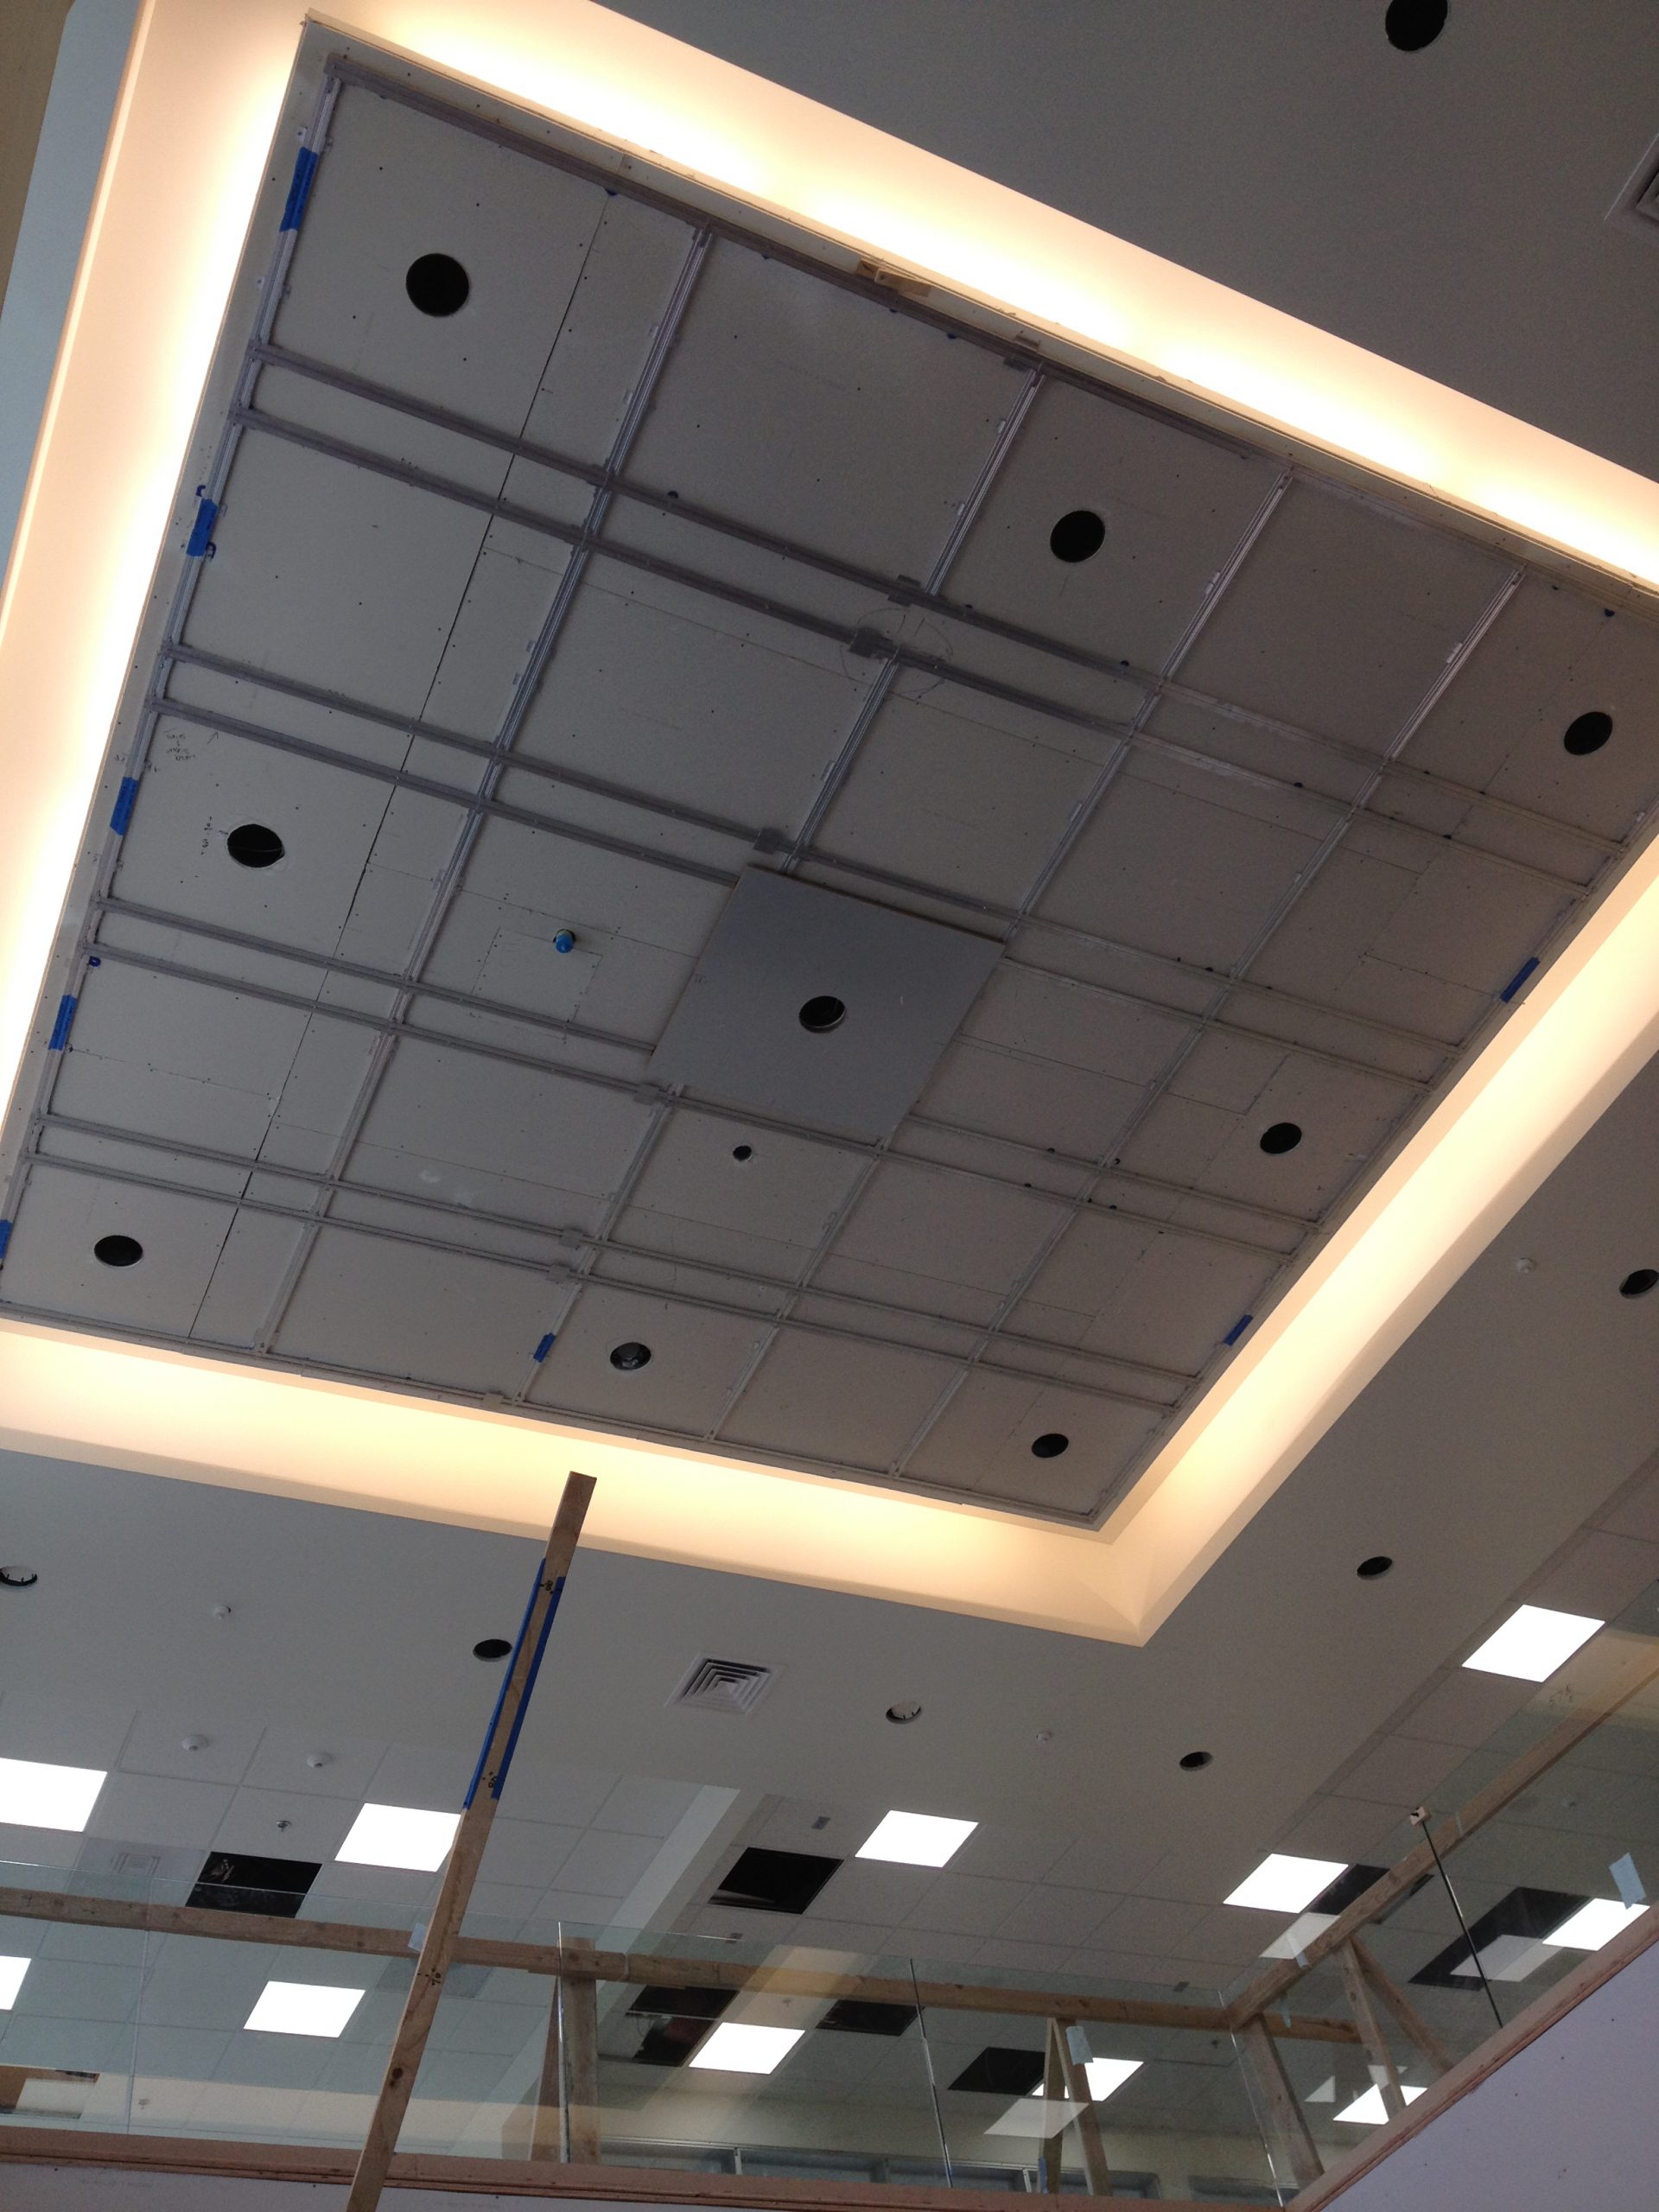
Ceiling Cladding
Mount the RailSet web directly to the CeilingLike The RailSet web on the wall, the RailSet web on the ceiling creates a perfectly level and square mounting surface in front of the hard lid of the ceiling. Rails are attached with Wall Mounts that slide on the rail to the ceiling joist. Panels are attached with cleats and locked in place with a screw in the edge screw boss.
Railset maximizes your design flexibility
- Create unique insets or drop ceilings with edge light coves.
- Rails can be shaped on a mandril to form a perfect radius for curved or round insets or drop ceilings.
- Allows you to use any panel finish suitable for your design specifications.
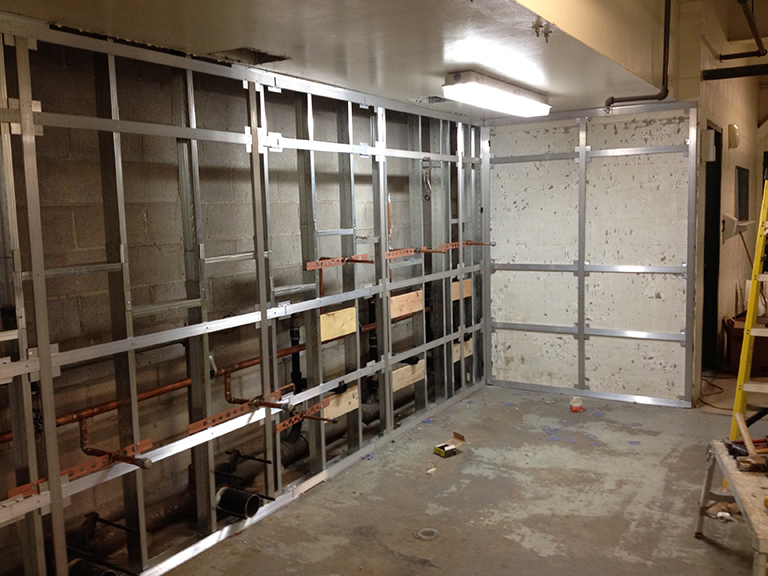
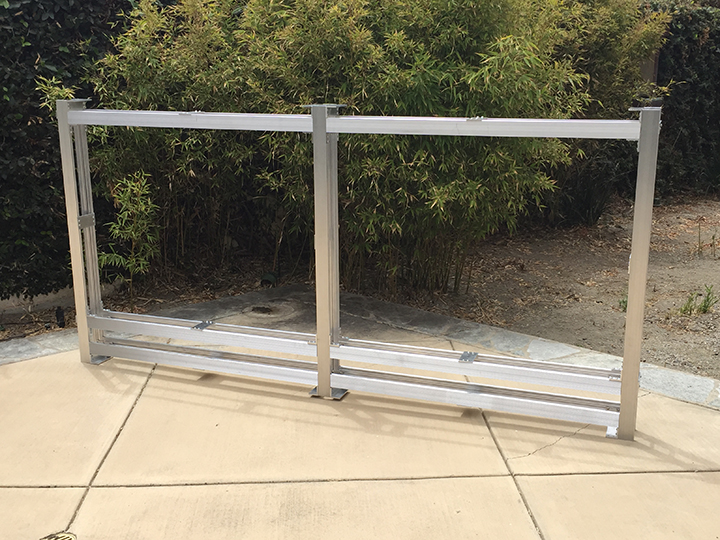
Utility Chase Frame
Railset Utility Chase Frame for Soffits, Pilasters, Columns and Light CovesRailset’s perfect 90° corner makes short work of cladding 2, 3 and 4 sided structures as well as outside corners. The one piece outside corner receiver makes every corner a perfect 90°. Used on an inside corner, the panels transition beautifully from a vertical plane to a horizontal plane.
- Build each side frame in the shop.
- Once on site, lock them together with the Outside Corner Receiver.
- Attach directly to a steel stud or I-beam.
- Build a base support for enclosing Caissons in a boxed frame.
- Chase area can be a minimal 3″ depth.
Finishing
- Finish the corner with a decorative insert or simply miter the panel edges.
- Cladding is attached with Clips, Cleats or Friction Fit appliances, depending on the panel layout.
- Select from stocked decorative trim for panel joints or give us a design for a custom trim insert.
- All decorative trim is available in a clear satin anodized finish.
- Custom anodized or powder coated finishes are available.
Partition Frames
The Railset Partition for privacy partitions, facings on nurse stations and reception desksA simple 4-sided frame can be assembled in the shop, delivered to the jobsite in one piece, mounted to the floor and leveled. Panels can be attached with cleats, clips, or a friction fit attachment for demountable panels. The interior of the frame is completely open and accessible to run utilities wires and cables. The seismic post fits neatly in the Railset standard 8’ x 4” partition.
The Railset partition can be delivered as a finished unit or knocked-down ready for assembly and installation. Delivered as a finished unit, Railset’s partitions can be considered part of the FF&E budget. The partition accommodates electrical outlets, video monitors, directories and more.
Usage Notes:
Railset is a very cost effective solution when a space needs to be reorganized quickly.
- Full height partitions mount securely to ceilings and floors.
- Half walls, full-height walls, all easy to relocate as needs change in a space.
- Unlimited selection of finish materials
- Railset can be installed directly to steel studs for quick, efficient remodeling and refurbishing.